Overview #
This guide shows how to setup credentials and permissions to the Microsoft Graph API in the Microsoft Entra admin central. The information output from this article is needed later in the Netgraph Entrypoint configuration setup.
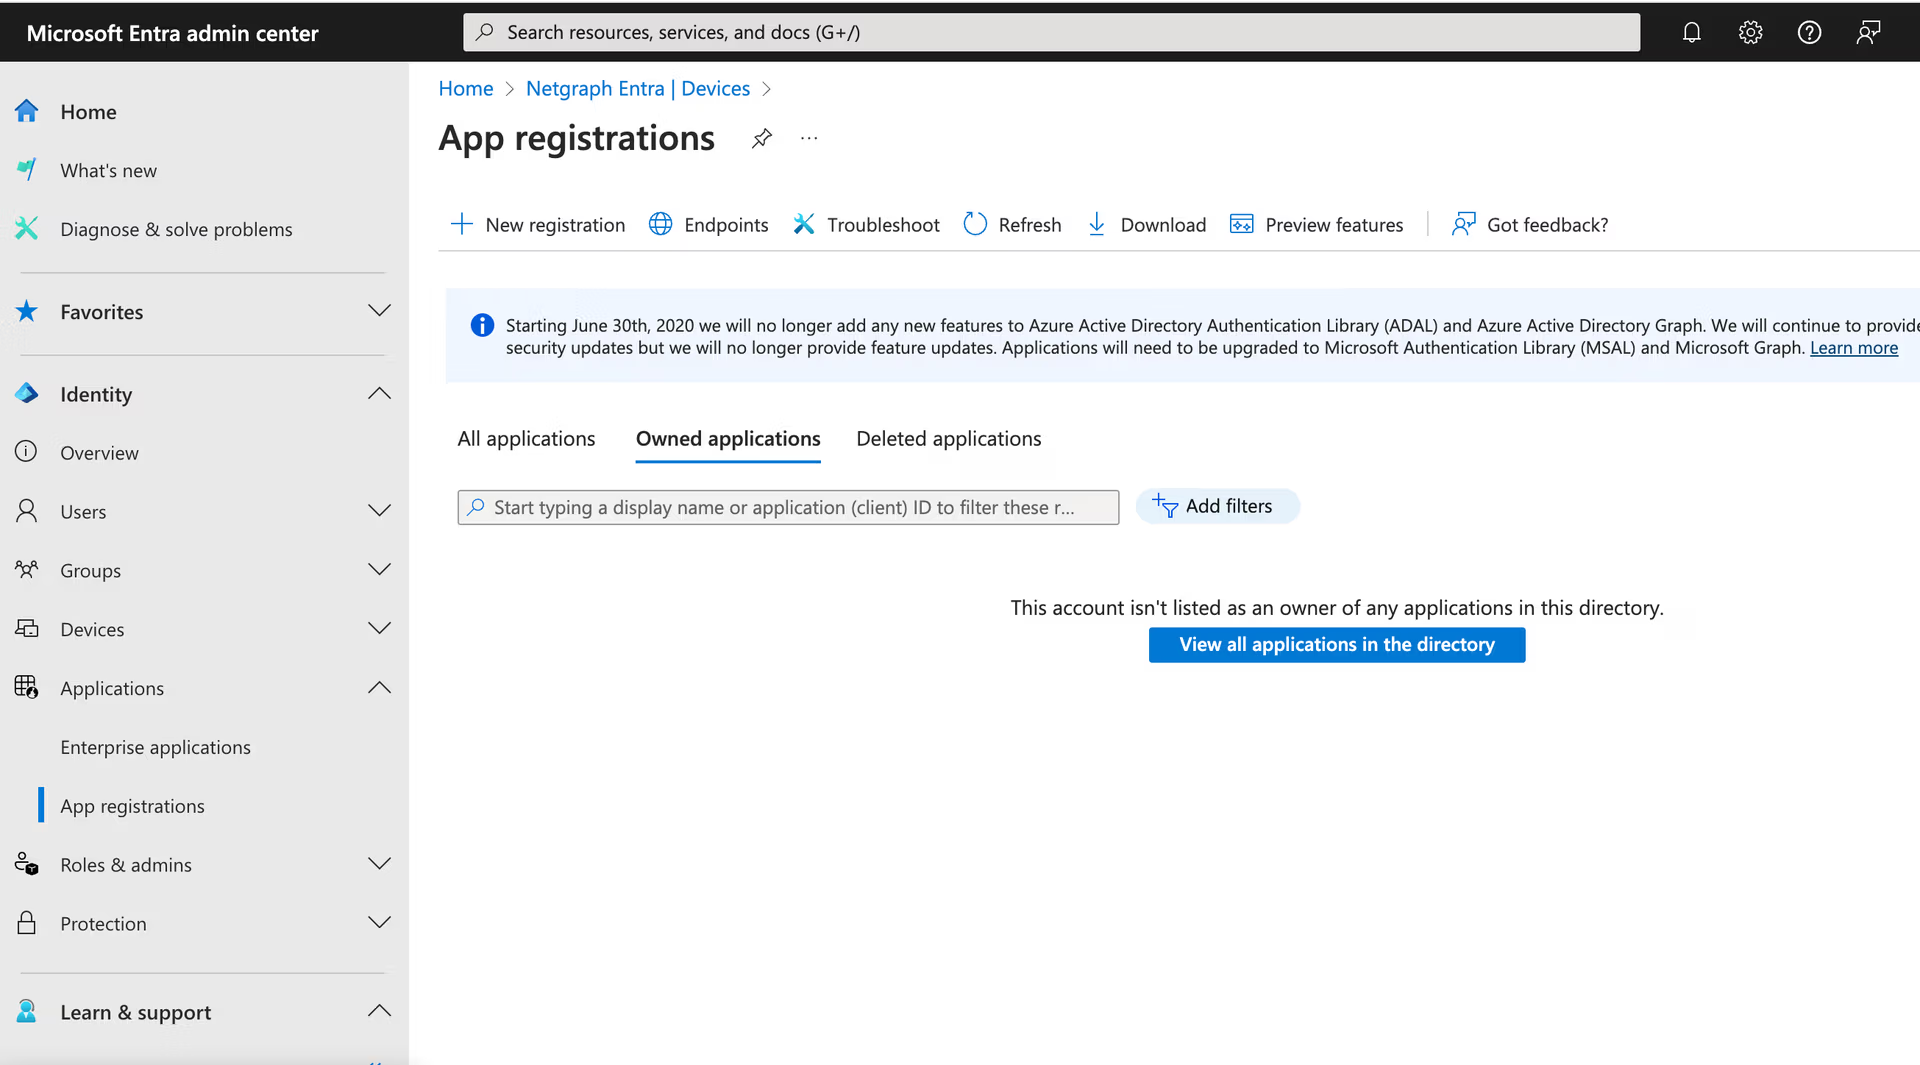
Getting started #
Navigate to the App registration in Microsoft Entra admin center. #
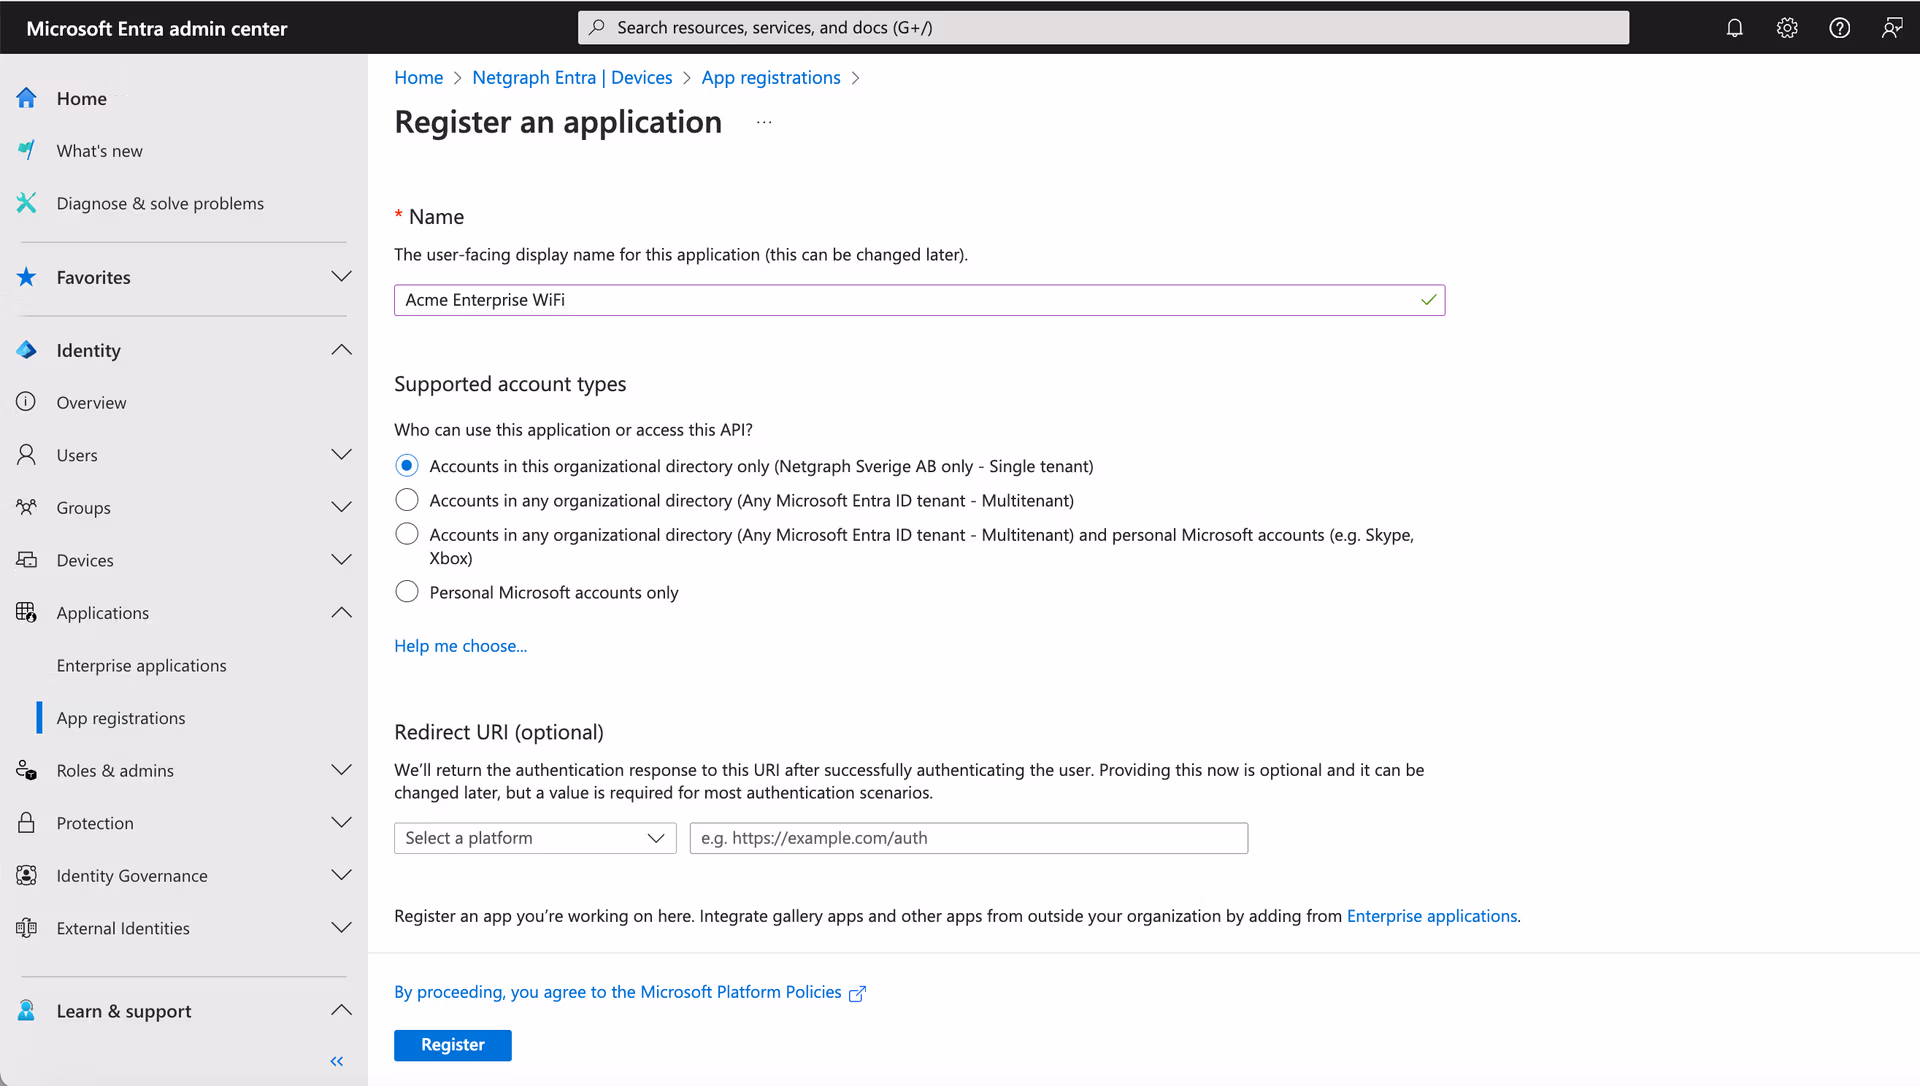
Klick the “New registration”. Name your app and click “Register” #
Copy the “Directory (Tenant) ID.. you will need it later in the Netgraph Entrypoint setup. #
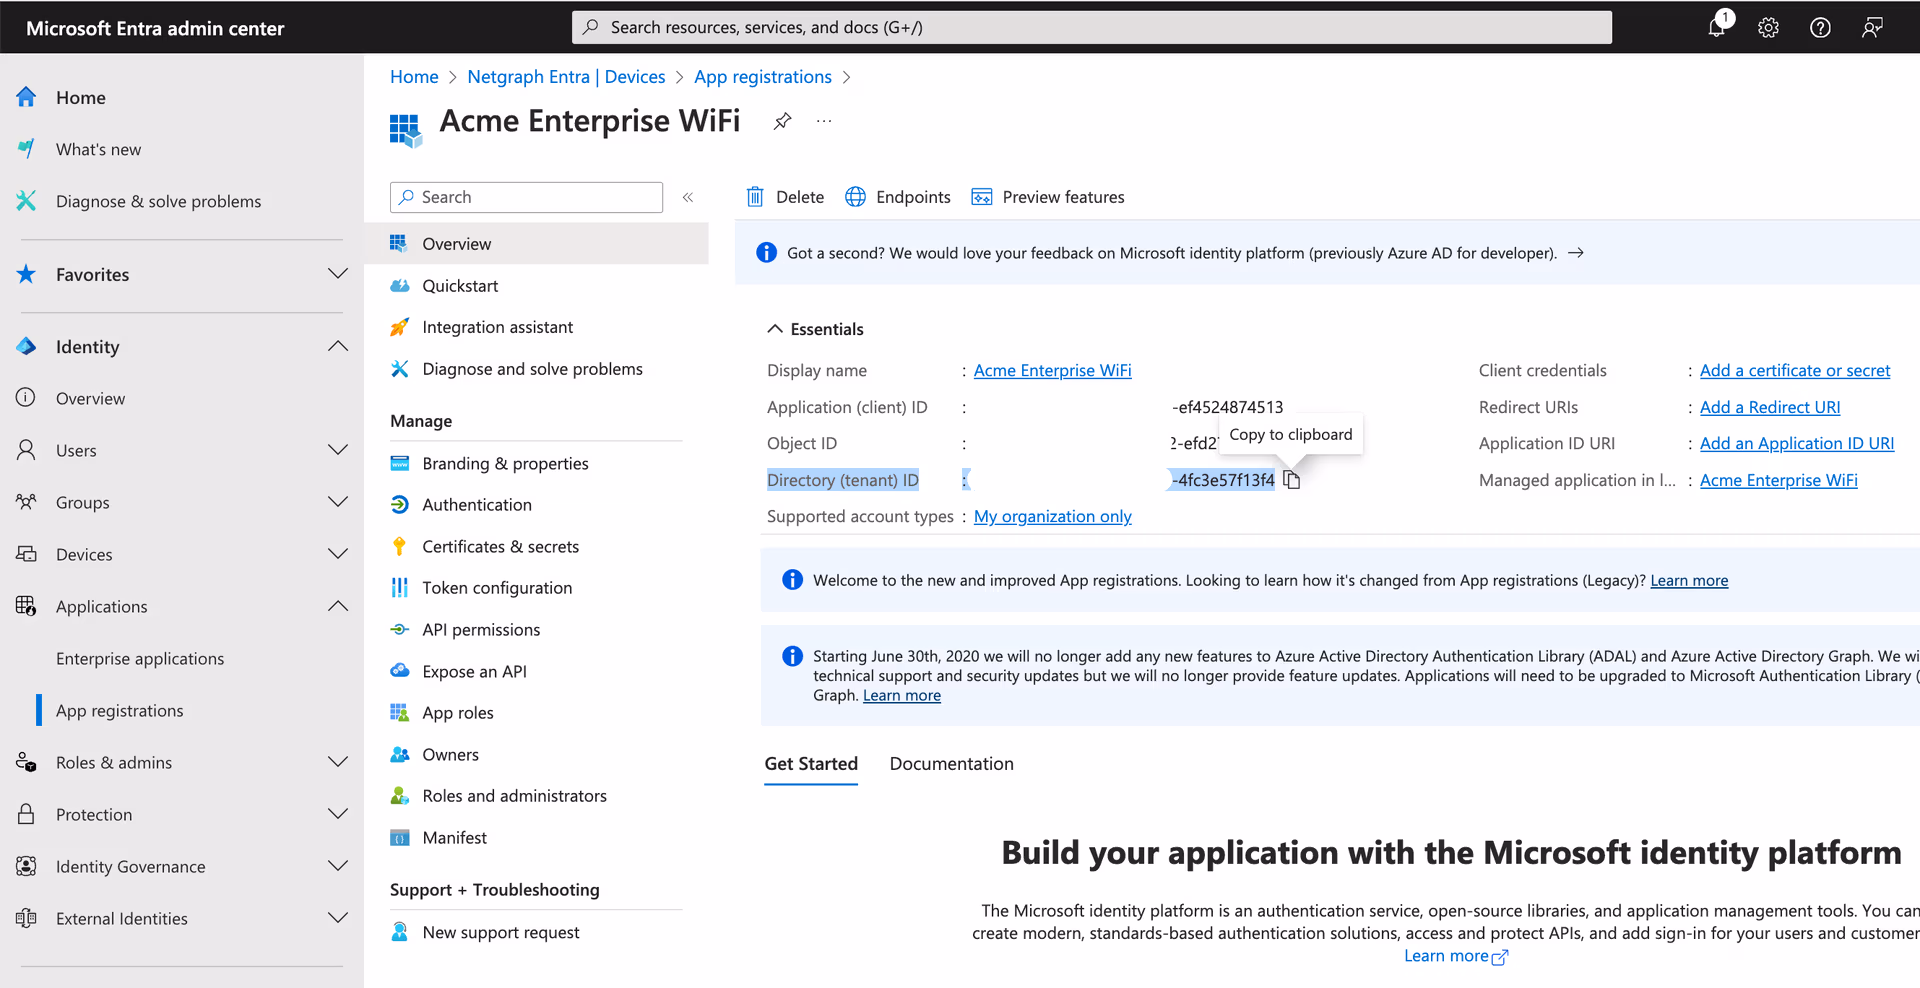
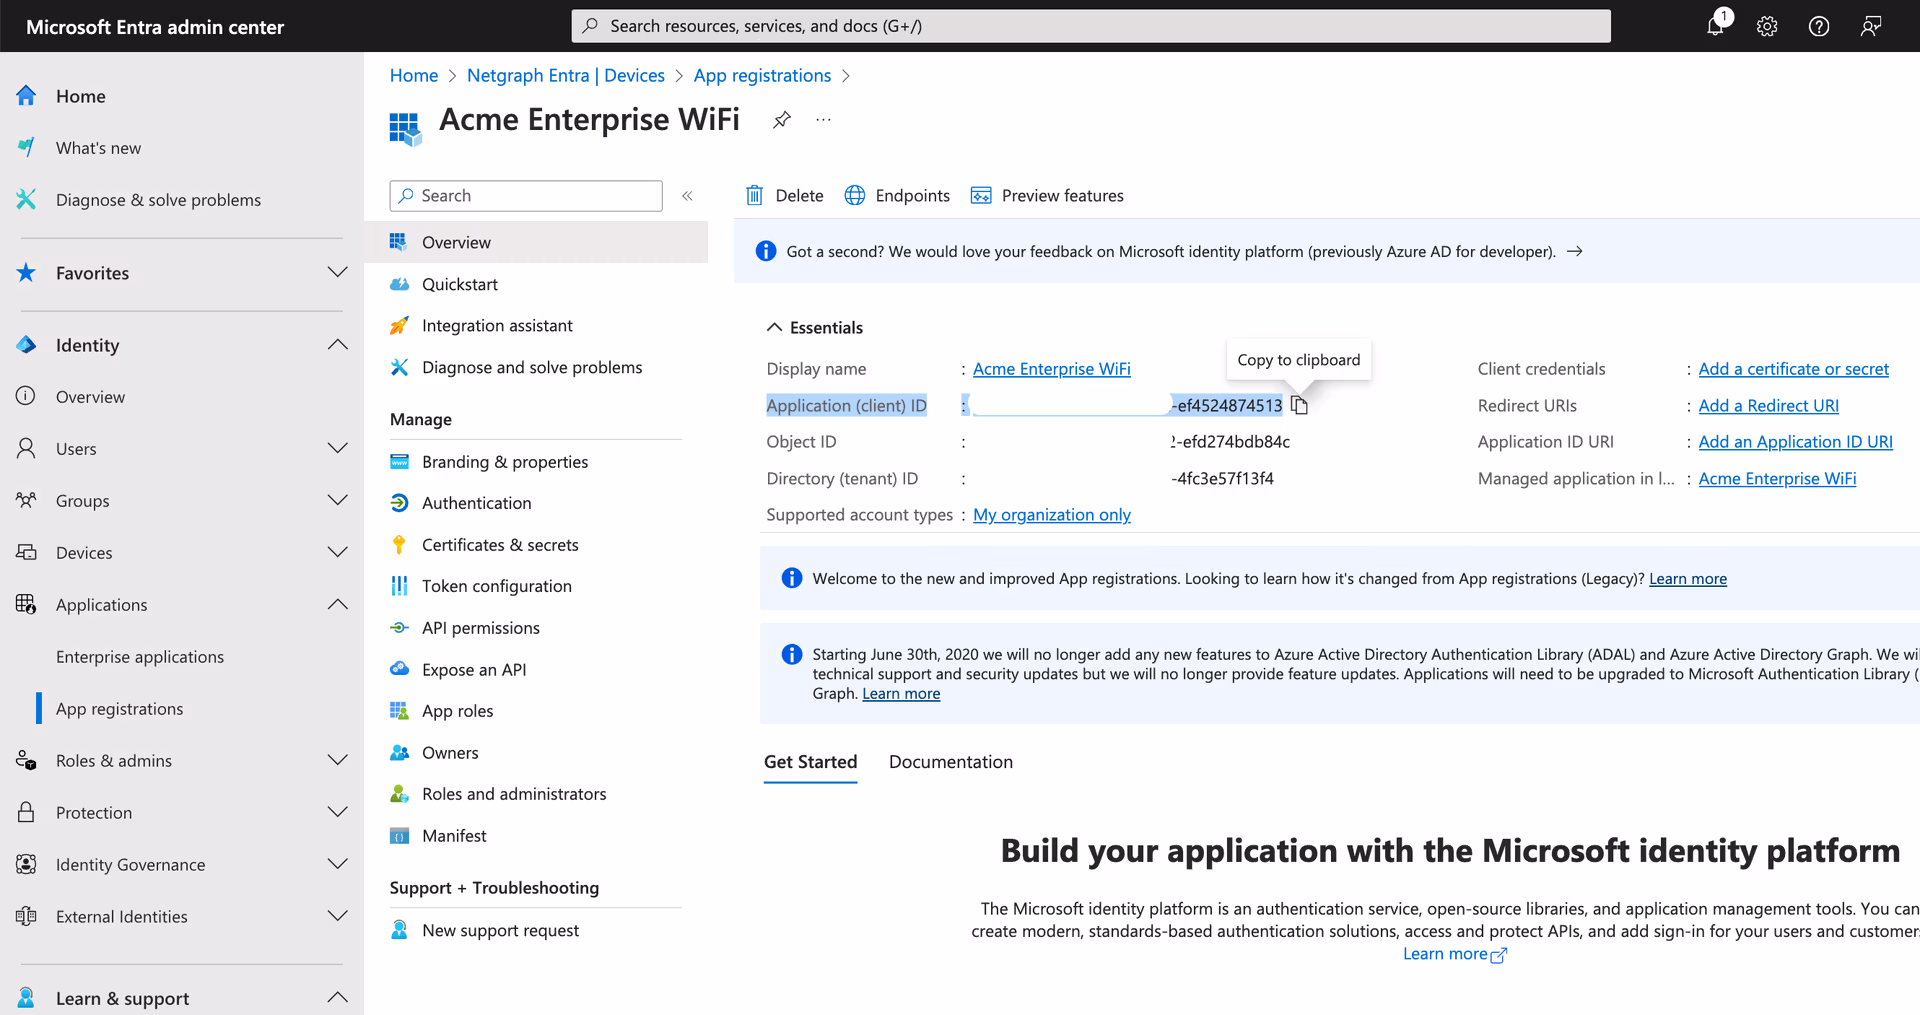
Copy the “Application (Client) ID.. you will need it later in the Netgraph Entrypoint setup. #
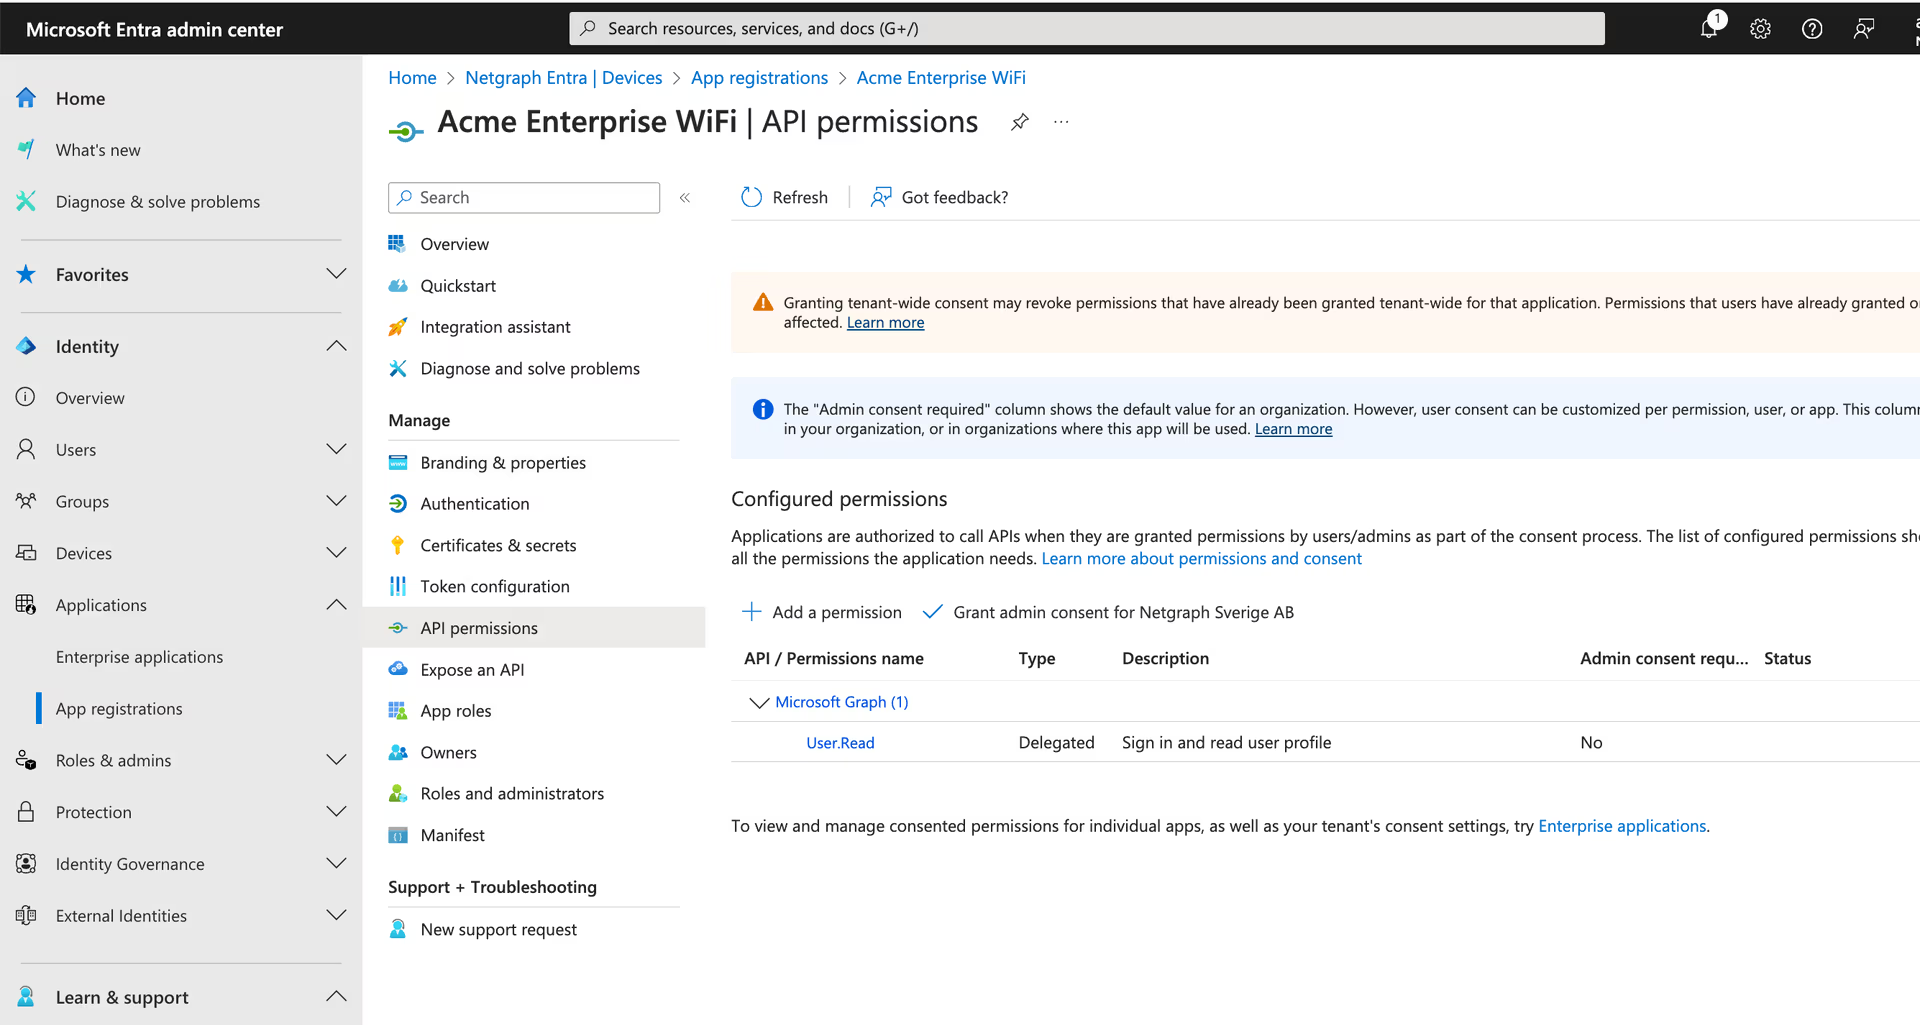
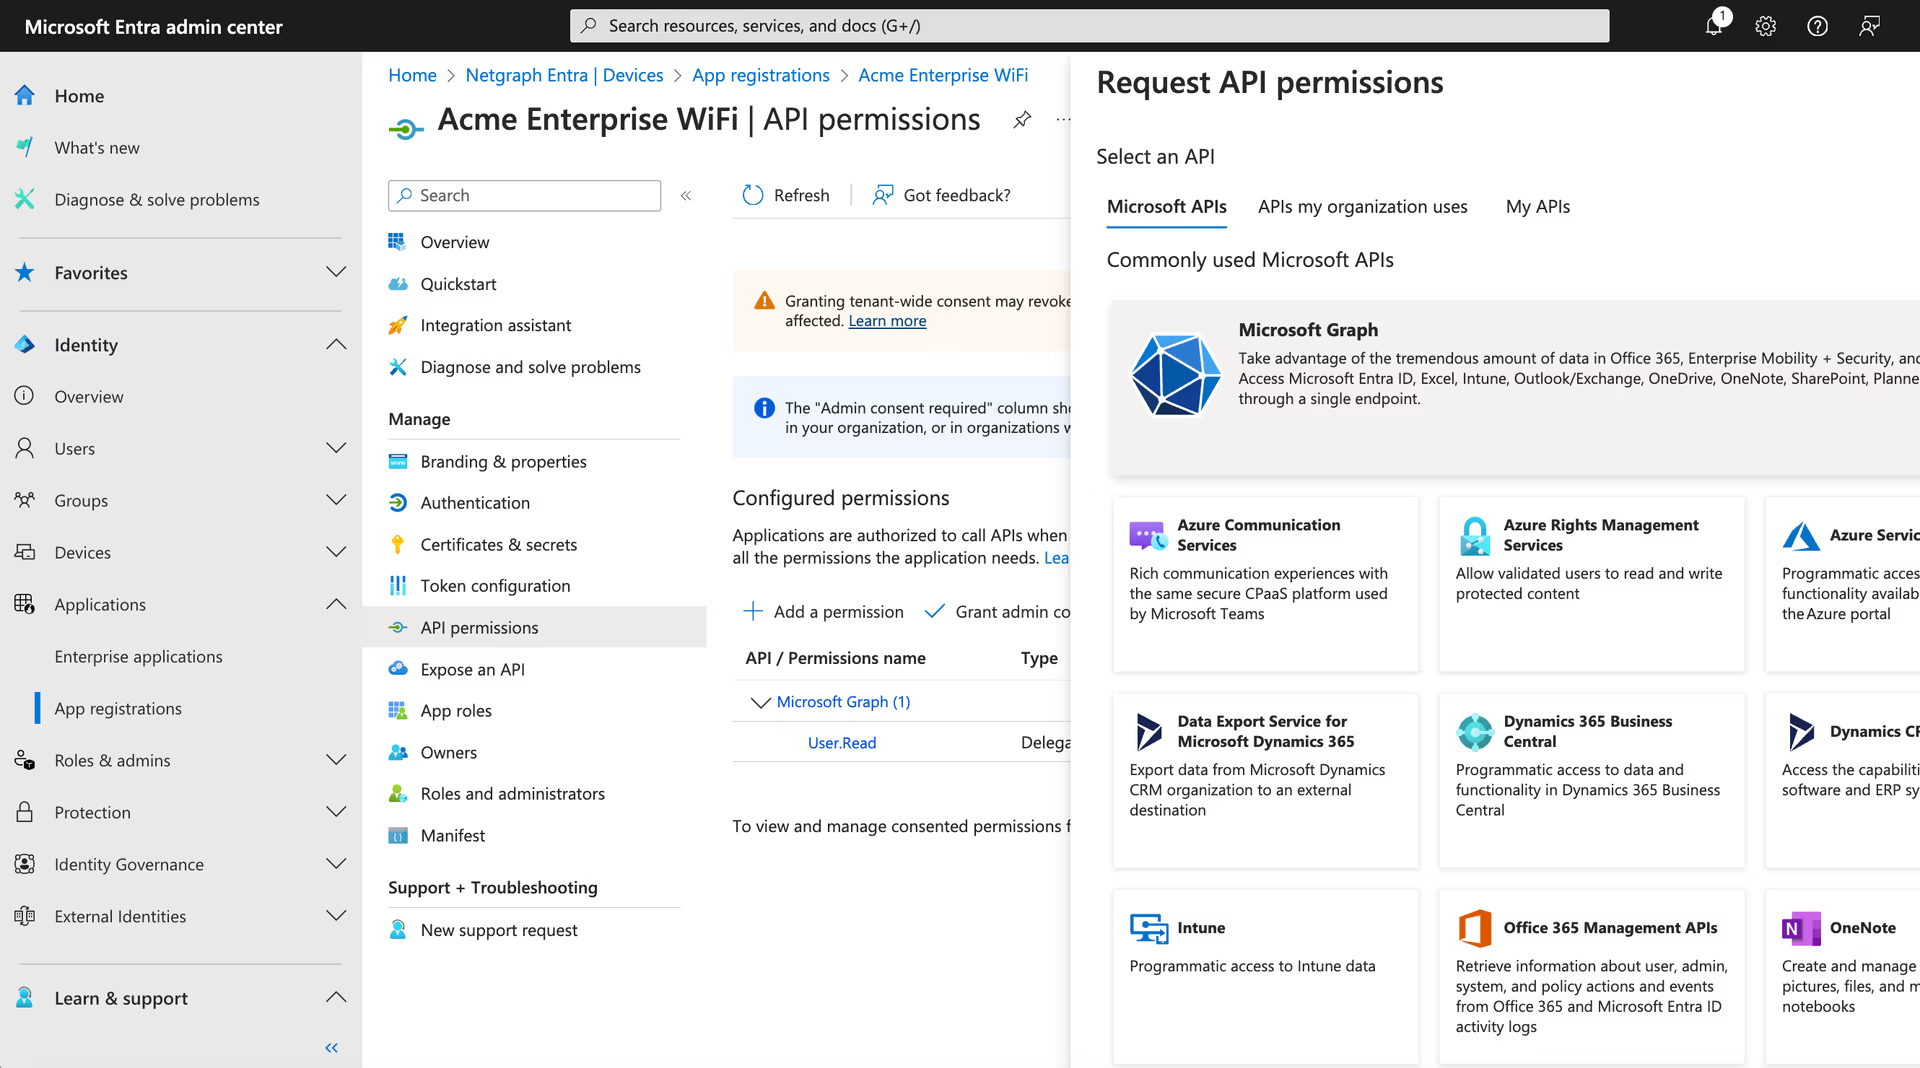
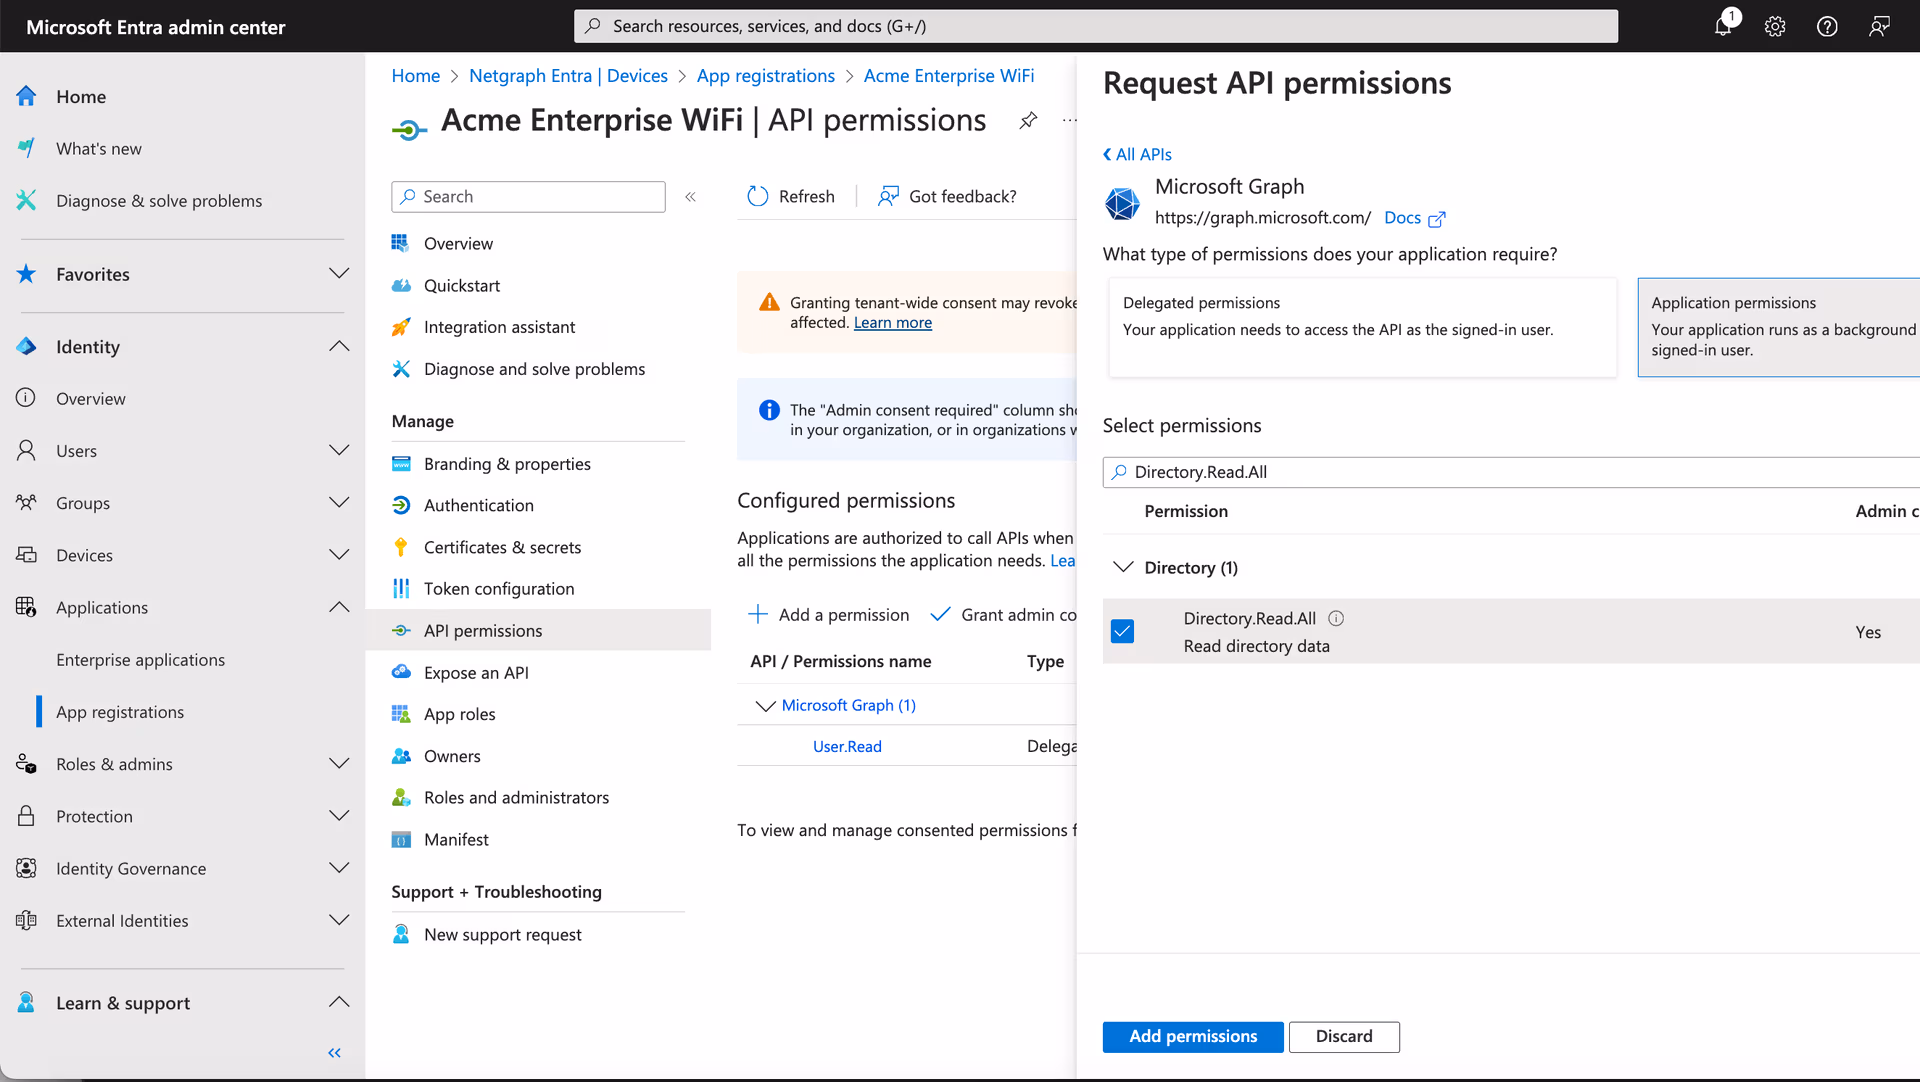
Navigate to “API permissions” and click the “Add a permission” #
Click the Microsoft Graph icon. #
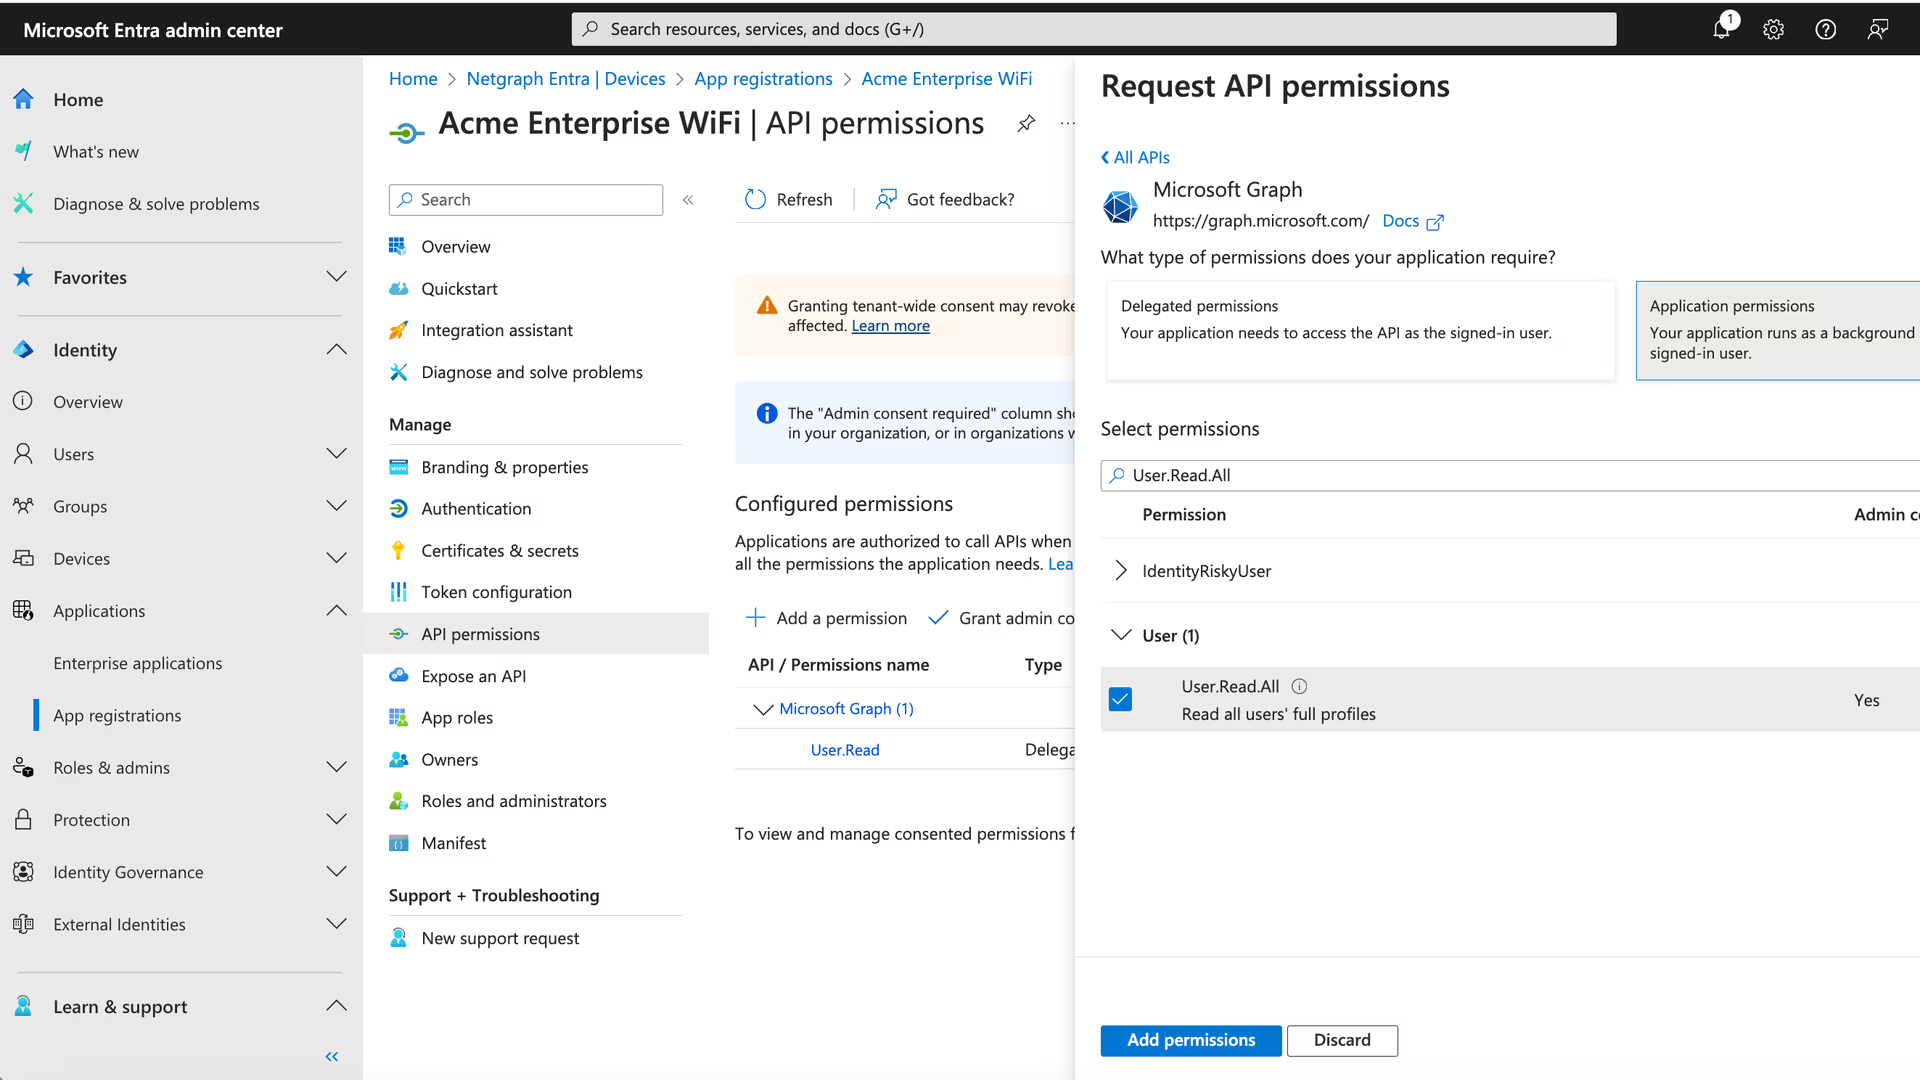
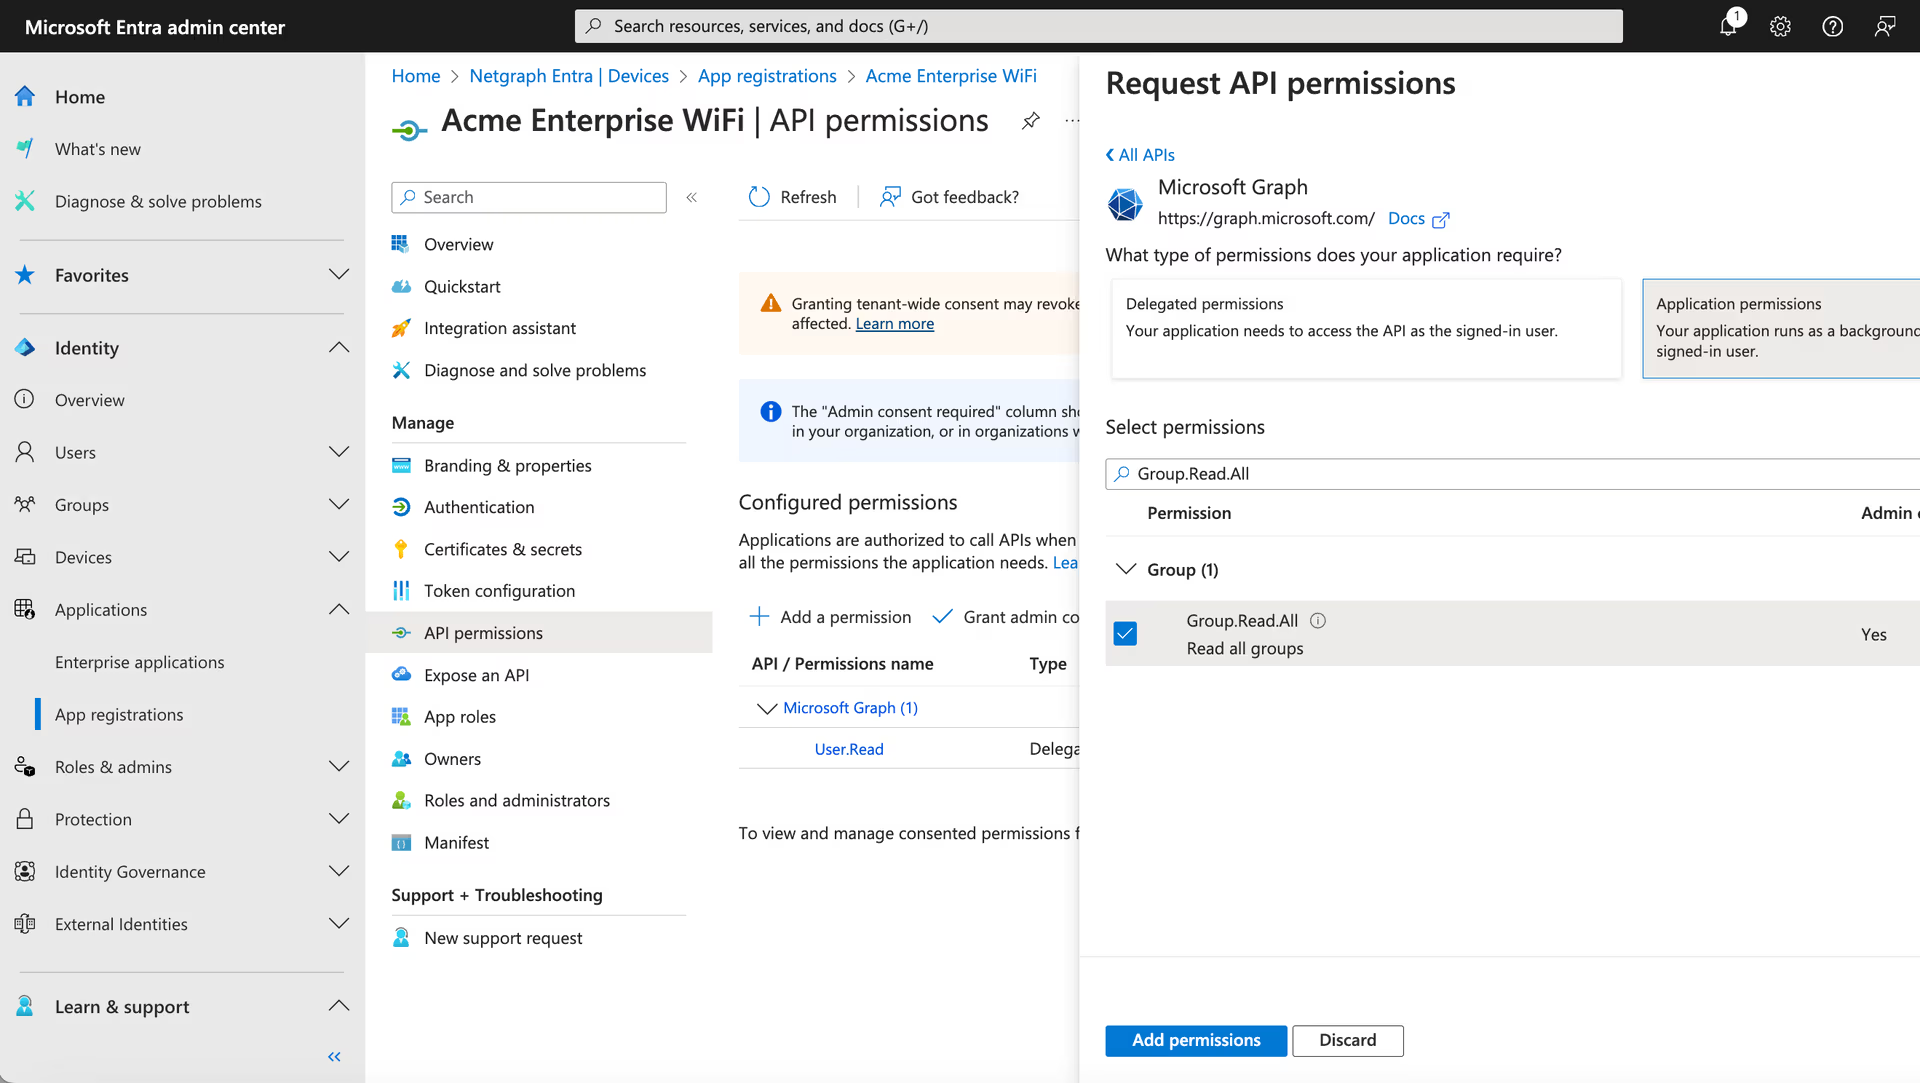
Set Application permissions. #
Mark the “Application Permissions” button and type “User.Read.All” in the “Select permissions” search window. Mark the User.Read.All and click the add permissions.
Repeat this steps also for permission “Group.Read.All” and “Directory.Read.All”.
When done click the “Add permissions” button.
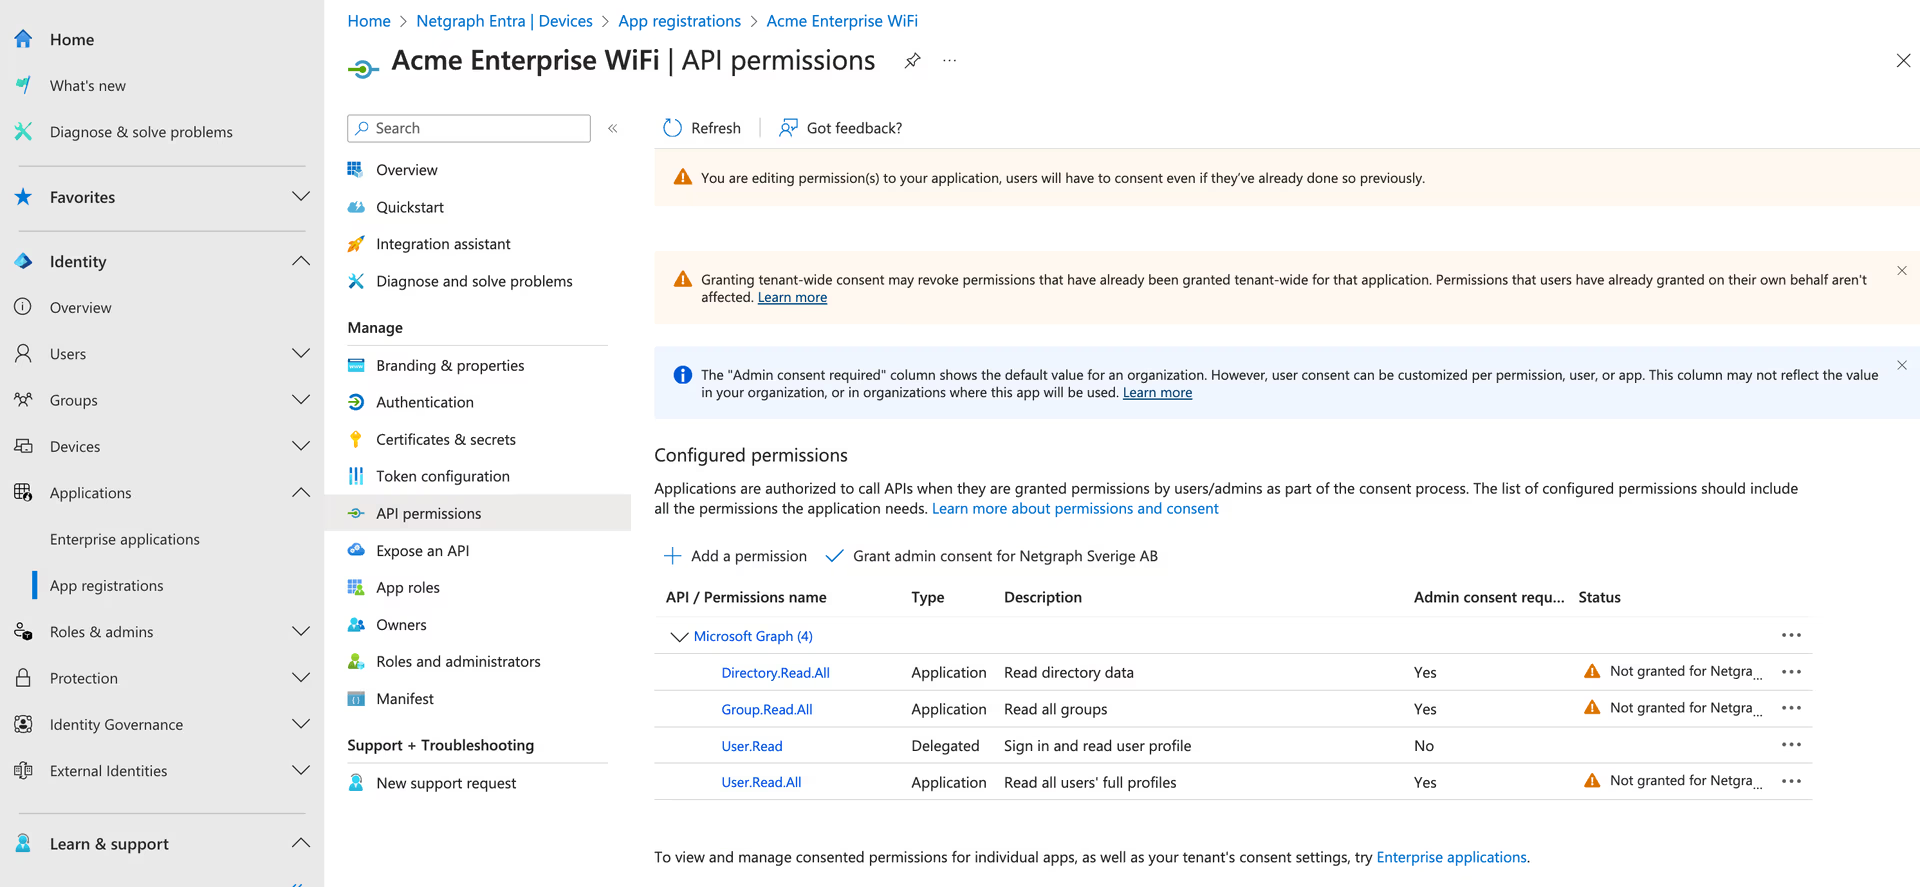
9. The “API permissions” view will now show all added permissions with the “Status” “Not granted for…” . To grant the permissions, click the “Grant admin consent for…” button.
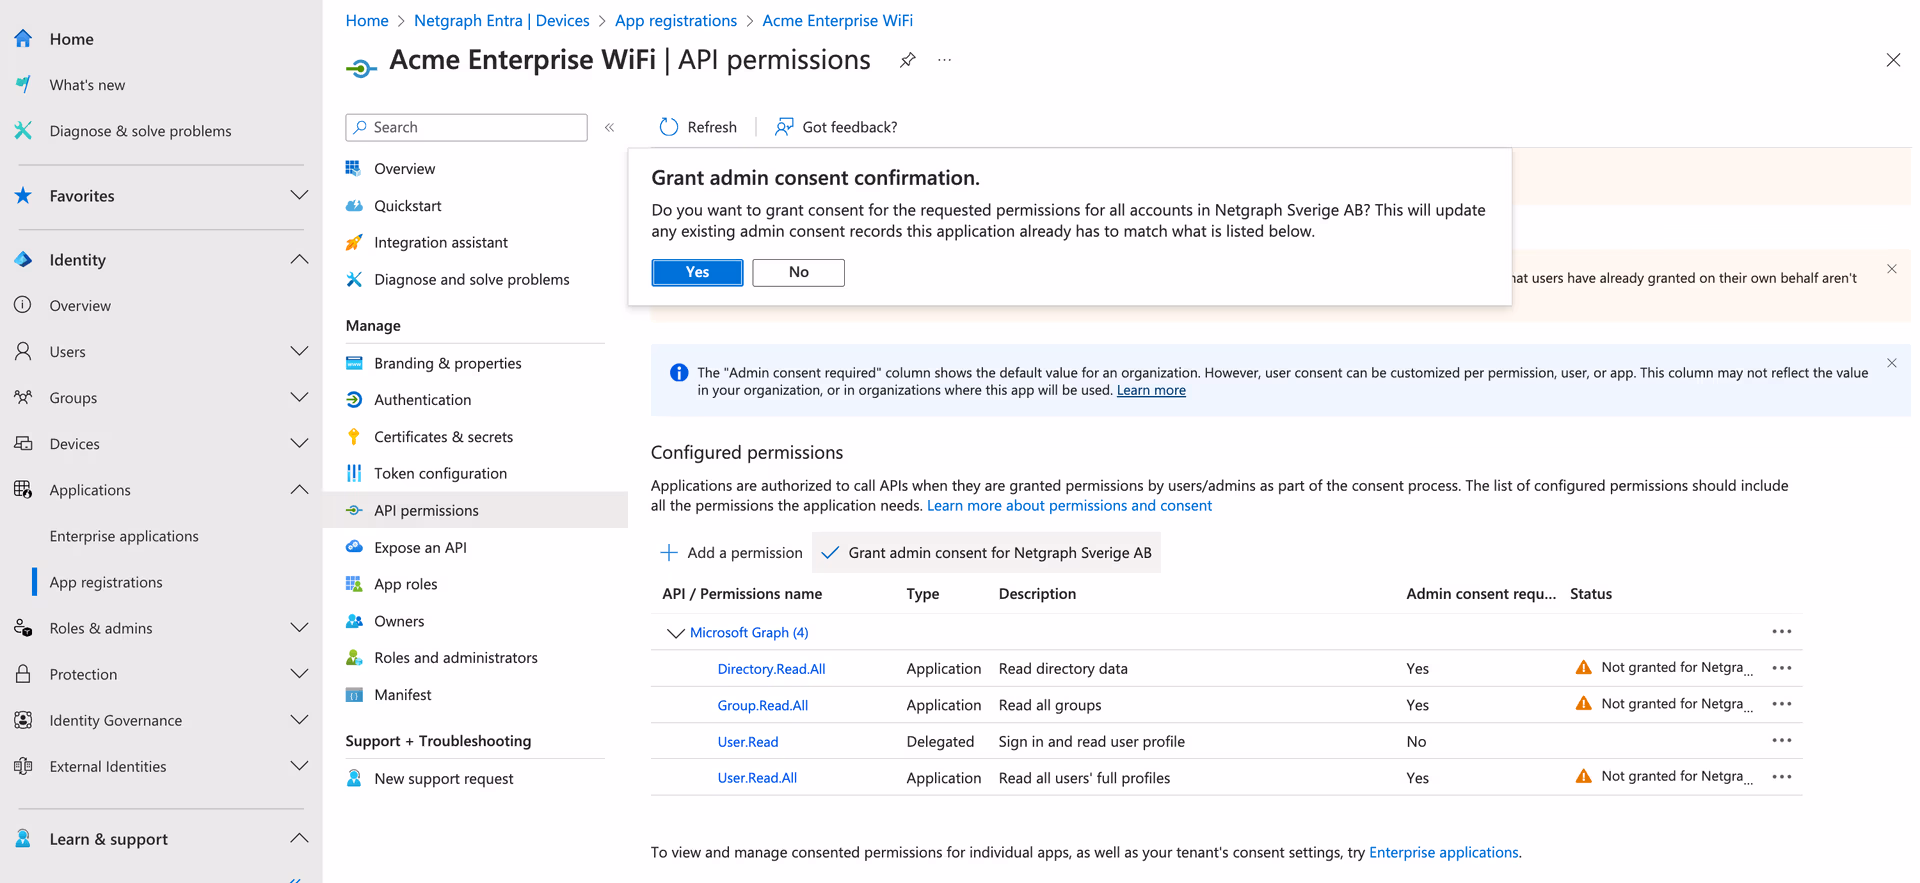
Confirm the consent dialog on the “Yes” button. #
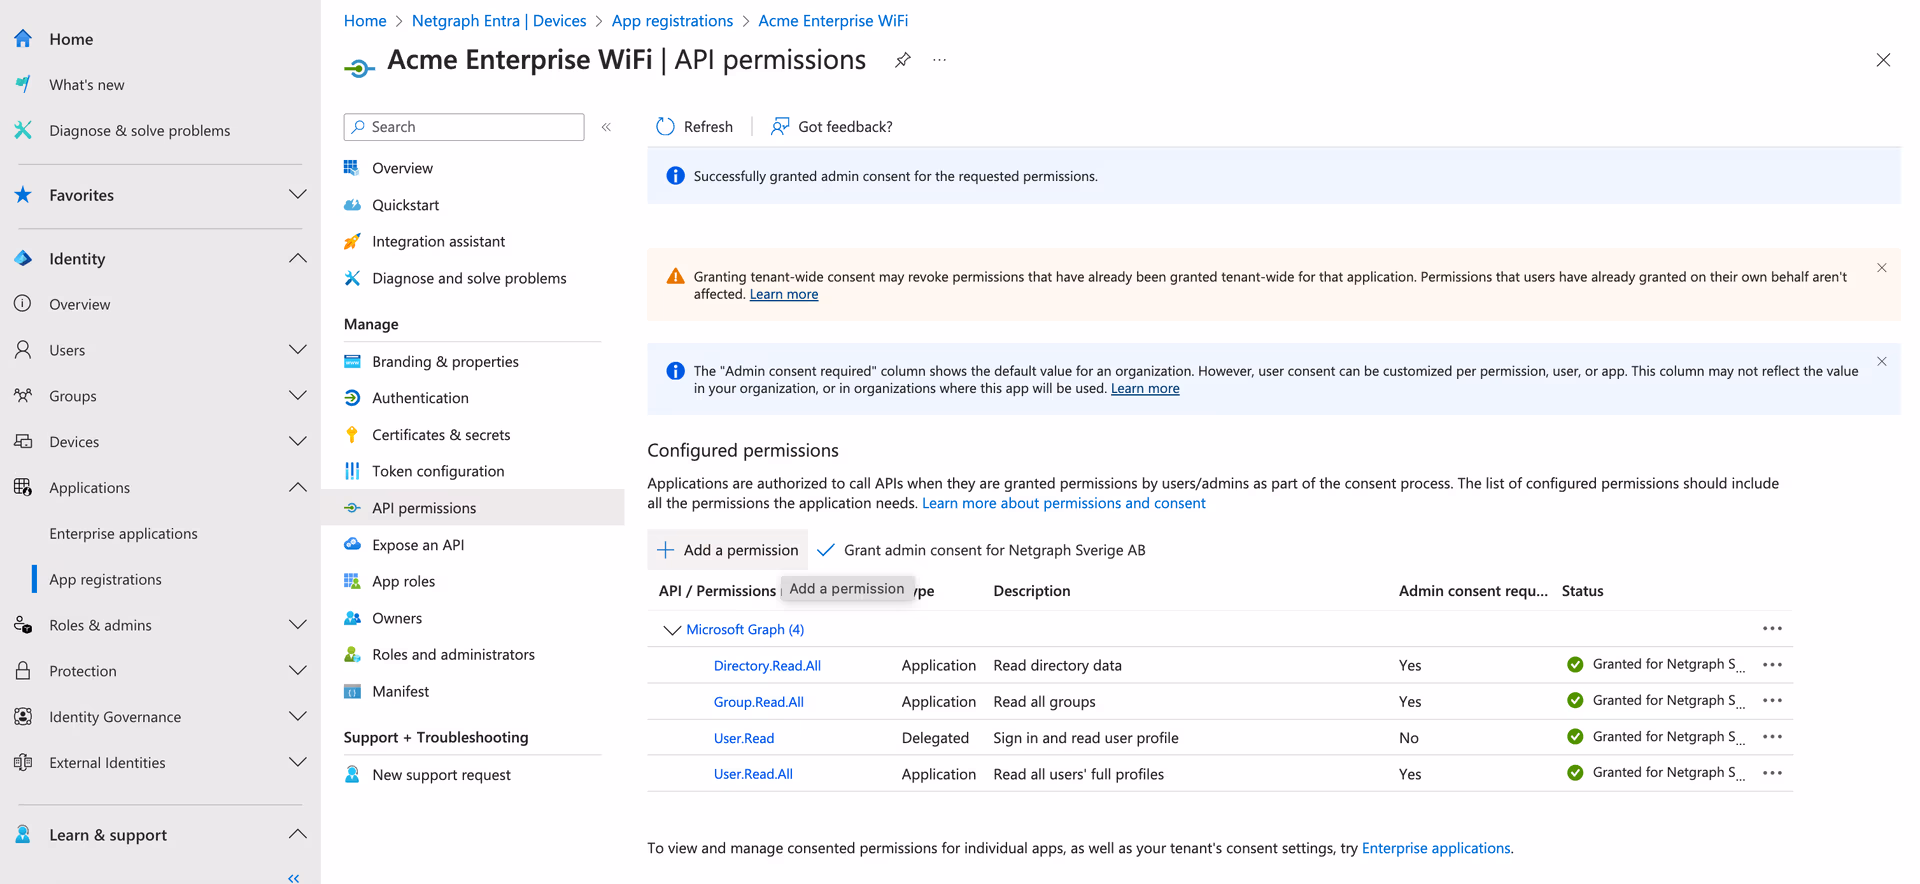
The “Status” should now show “Granted….” #
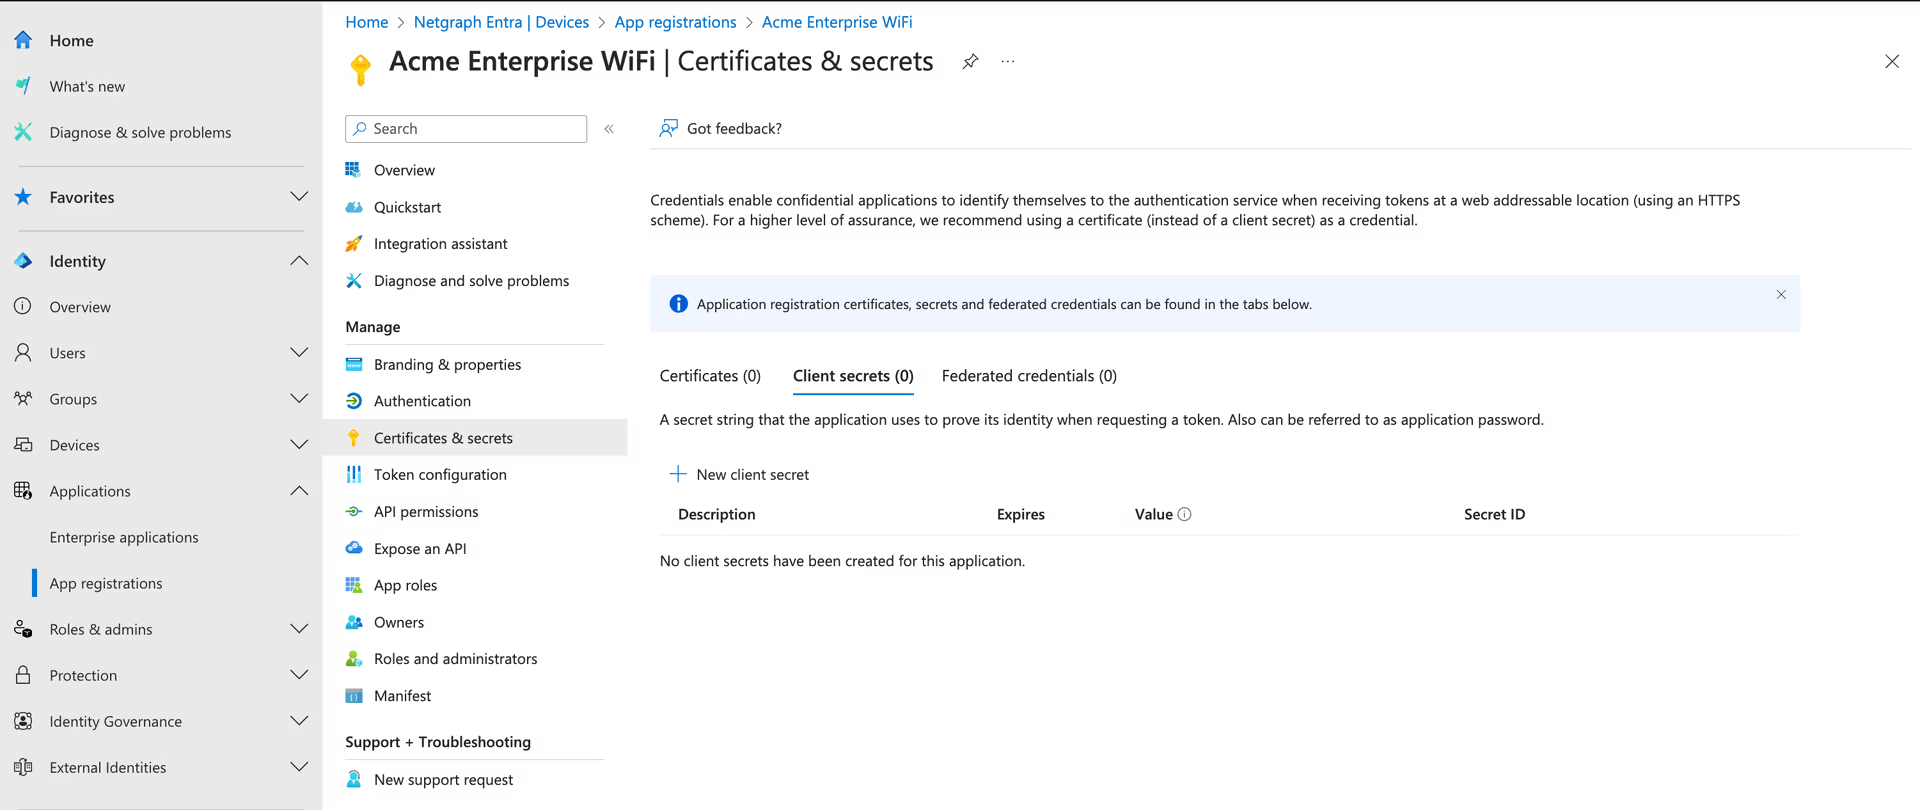
Proceed to the “Certificates and secrets” in the left and click “New client secret” #
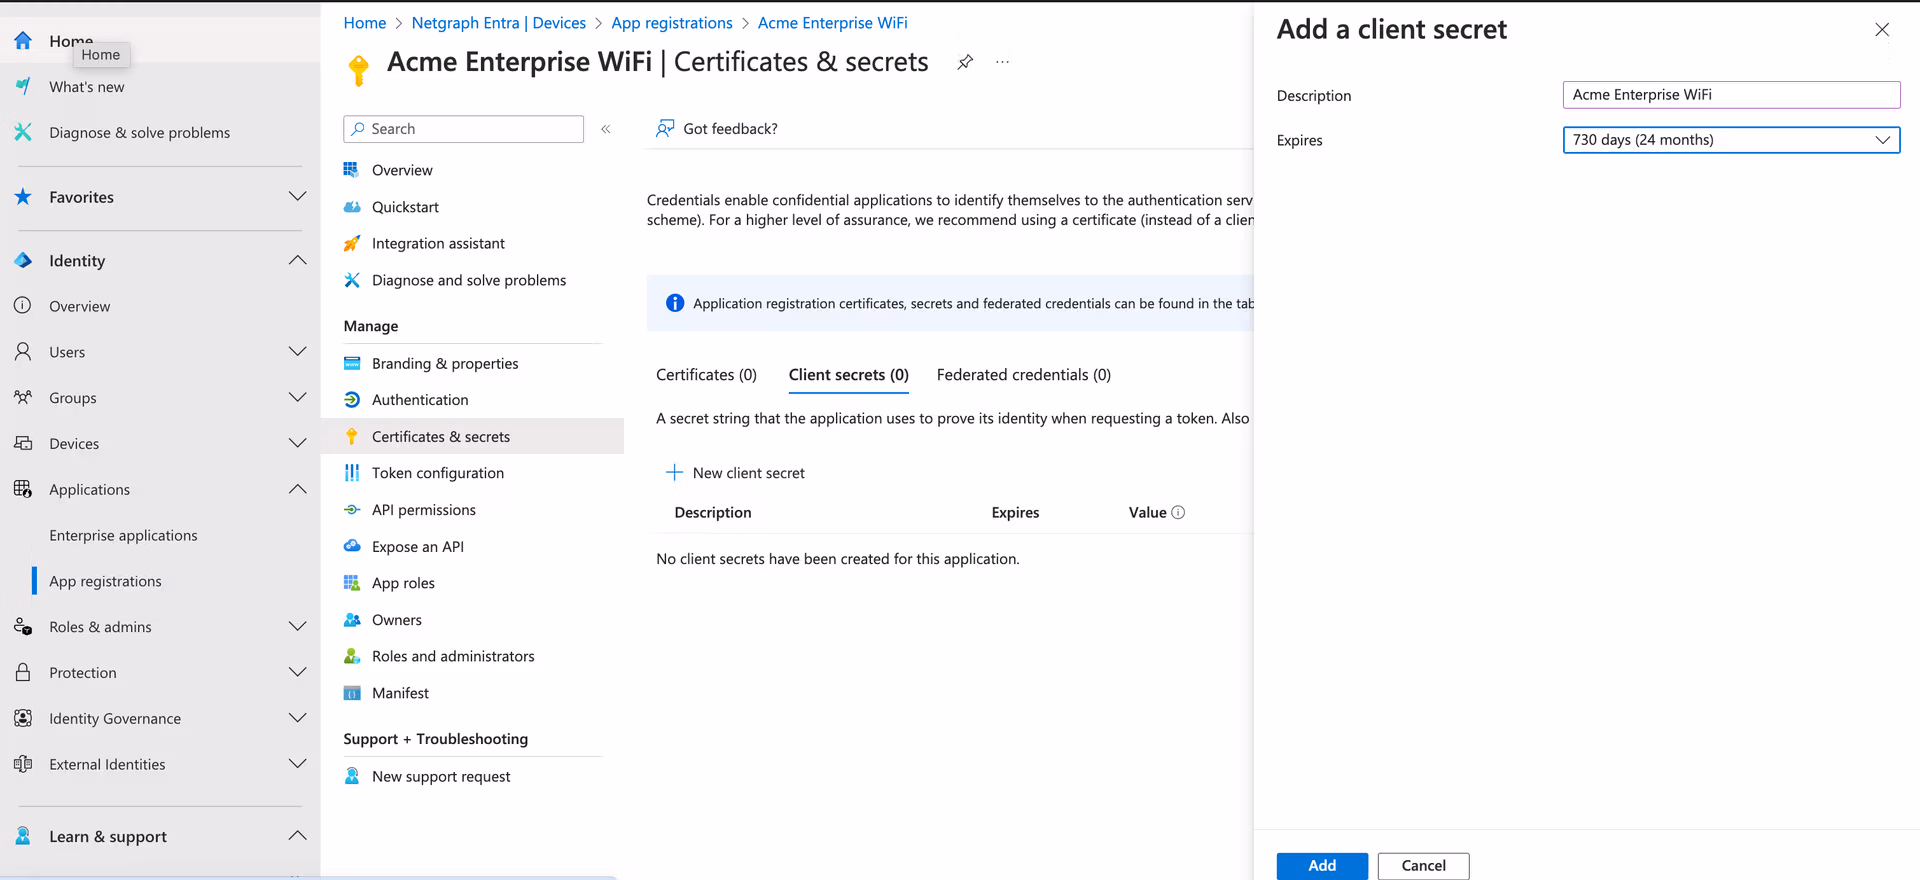
Set a Description, When you want the secret to expire, and click add. #
Copy the “Value” of the secret.. you will need it later in the Netgraph Entrypoint setup. #
