To enable the integration, configuration is done in the Cisco ISE Primary Administration Node as well as in the Netgraph Connectivity Platform’s administration portal.
Summary of the configuration steps ahead:
| Cisco ISE Administration Portal | NCP Administration Portal |
|
|
#
Let’s get started with the ISE Administration Portal configuration. #
Cisco ISE Administration Portal #
1. Enable API Services and API Gateway #
In the ISE Portal, navigate to Administration -> System -> Settings -> API Settings.
Select the tab “API Service Settings”.
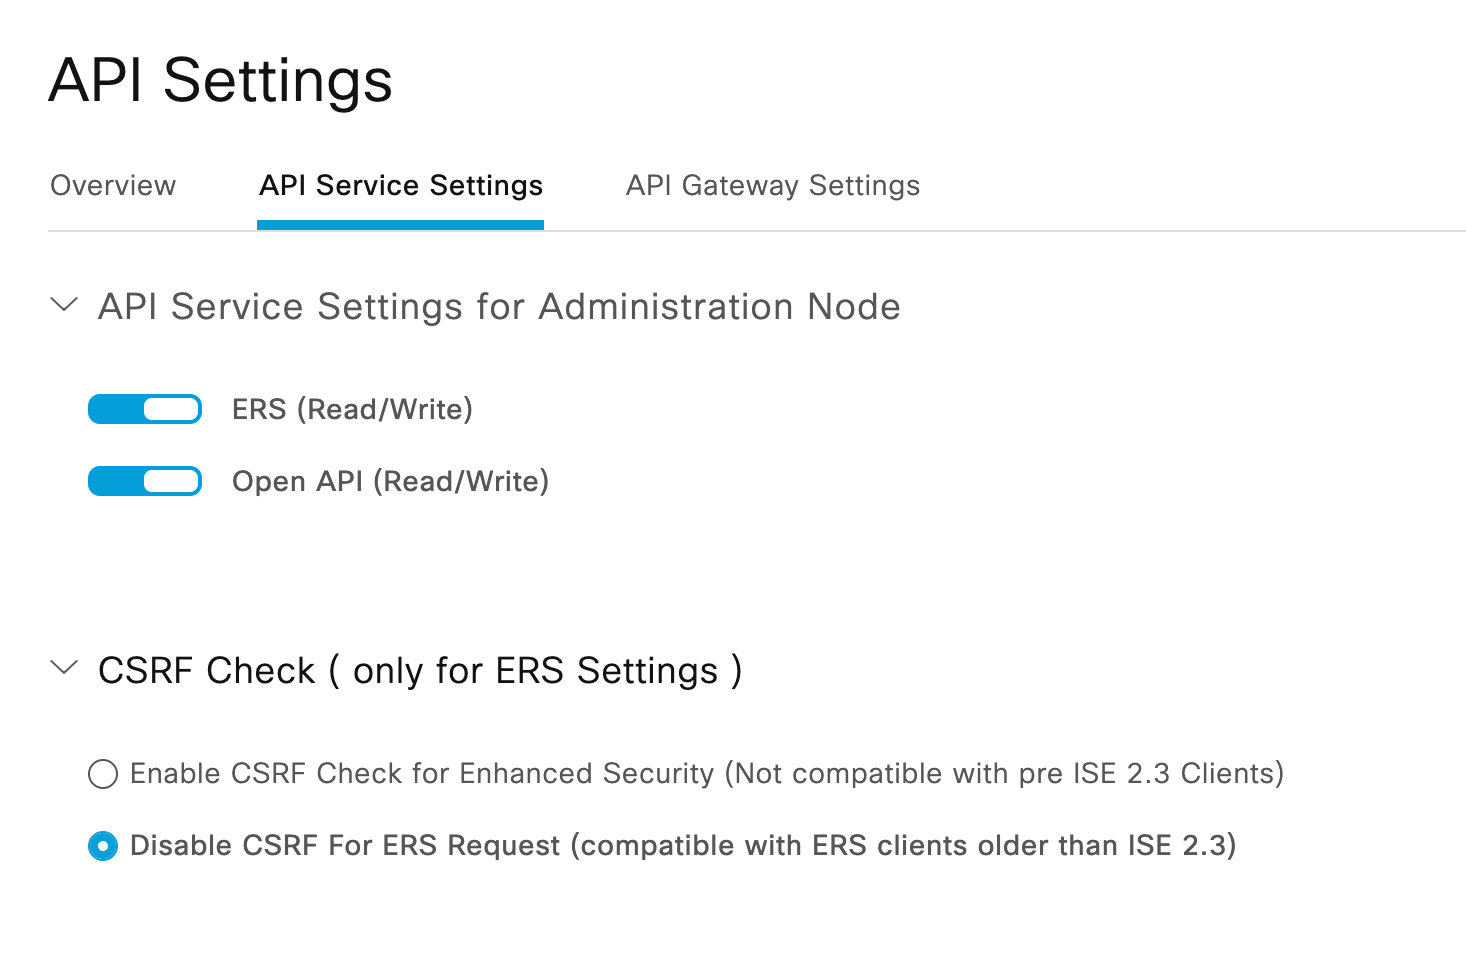
Make sure that:
- ERS (Read/Write) is enabled
- Open API (Read/Write) is enabled
- Disable CSRF for ERS Request
📝 Note! Differences in API Settings Between Cisco ISE 3.4 and Earlier Releases #
There are visual and functional differences in the API configuration screens between Cisco ISE 3.4 and earlier releases. This is important to be aware of when following guides or troubleshooting API access.
🔄 Key Differences:
| Feature | Cisco ISE before release 3.4 | Cisco ISE 3.4 |
|---|---|---|
| ERS API (Read/Write) | ✅ Available | ✅ Available |
| Open API (Read/Write) | ✅ Visible and configurable in UI | ✅ Enabled by default (not shown in UI) |
Also, make sure that an API Service Gateway is enabled.
Select the tab “API Gateway Settings”.

2. Create an ISE Admin User (API User) #
In the ISE Portal, navigate to Administration -> System -> Admin Access -> Administrators – Admin Users.
Select Add -> Create an Admin User.
Ensure “Inactive account never disabled” is checked since this user will never log in via the ISE Admin Console. Otherwise, the account will be disabled after some time.

Add the following Admin Groups:
- Mnt Admin
- ERS ADmin


⚠️ Note! Preventing API Admin Account Lockout in Cisco ISE #
To ensure that API users (or other automated admin accounts) do not become disabled due to expired passwords, make sure to uncheck the option:
“Administrator passwords expire”
(Location: Administration > System > Admin Access > Password Policy)
Enforcing password expiry on service accounts can lead to outages when credentials expire unnoticed. Use this setting only for interactive accounts, and document API credentials with care.
3. Create Endpoint Custom Attributes #
EntryPoint stores metadata about who and when an endpoint was added or modified in ISE. This is done via Endpoint Custom Attributes.
In the ISE Portal, navigate to Administration -> Identity Management -> Settings -> Endpoint Custom Attributes.
Add the following Endpoint Custom Attributes
| Endpoint Custom Attributes | Type |
| ngUpdatedAt | String |
| ngDeviceType | String |
| ngCreatedBy | String |
| ngUpdatedBy | String |
| ngCreatedAt | String |
4. Done #
The Cisco ISE configuration is now complete.
NCP Administration Portal #
Now let’s continue with the NCP Administration Portal configuration.
1. Select Service -> ISE Device Management #
In the NCP Administration Portal, navigate to Services -> ISE Device management.
2. Create a new ISE Context #
Create an ISE Context and name it.
3. Configure the ISE API integration #
Configure the following fields:
- Cisco ISE Base URL:
- Enter the base URL of your Cisco ISE API endpoint.
- Example:
https://ise.acmecorp.com
- Username:
- Provide the administrator username that you created earlier. It will be used to authenticate API requests.
- Password:
- Enter the password associated with the provided username.
- Done
- Once API configuration is complete, a status pane will appear with the current API Setting Status.
Troubleshooting
- Having problems setting up the connection? Please follow the API Gateway Connectivity Troubleshooting Guide.
Next Step #
Delegate ISE Endpoint Management described in the article Delegate ISE Endpoint Management